When you are in B2B you are in a good position to track more than the metrics Google gives you about running any paid campaigns. A lot of companies are running Google Ads which easily can become quite expensive and they often only track the outcome at the very end of the funnel; purchase and/or signup.
Getting more insights is not only crucial for your marketing team, but it will also help you to build a better alignment with your sales team. In this Leadfeeder guide, we will show you that you can see a lot more about which companies are clicking on your paid campaigns and what they have done. This way you can give your sales a lot more leads against the same budget you have within your marketing department. Which should increase your ROI on your paid marketing campaigns.
Pro tip: Use UTM tags for all your paid campaigns
Besides getting more insights in your Adwords campaigns you can also use Leadfeeder for your Account-Based-Marketing. We have written a full guide on this as well. When you are targeting specific companies this can be very helpful.
What will we dive into this guide;
Source of visiting companies
Before we dive into the specific paid campaigns it is important to know you can see the traffic of companies coming to your website per source. There is a huge difference between Google Analytics (GA) and Leadfeeder as within GA you only see numbers, within Leadfeeder you can see the actual companies coming onto your website. The only thing you need to do is to add a tracking pixel to your website.
After you will get insights into which companies have visited your website in a certain timeframe.

How to see the source of the companies visiting your website?
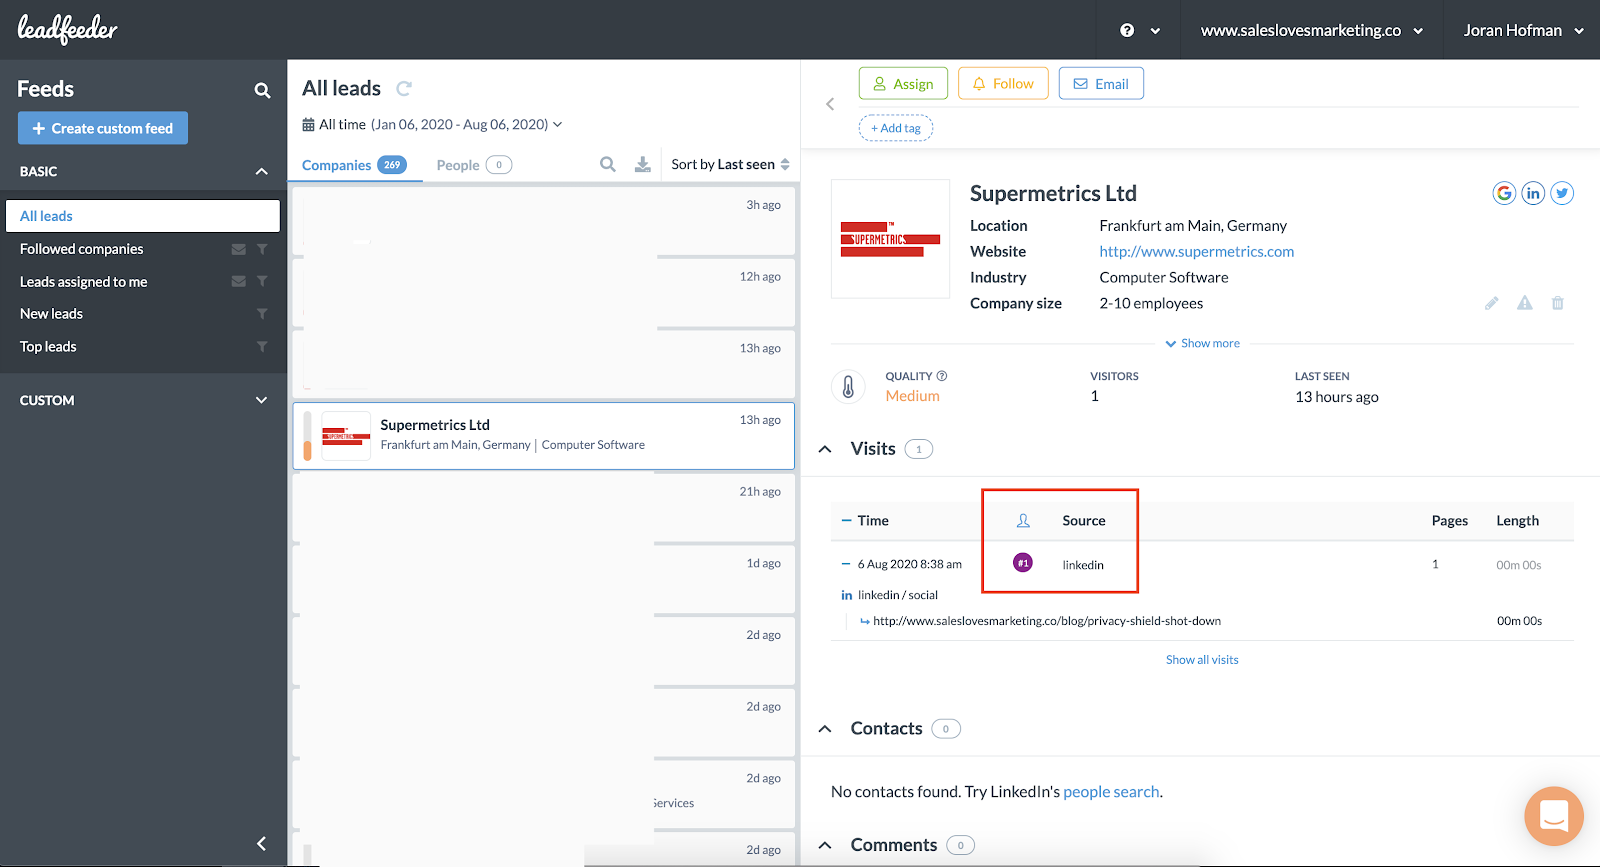
This is quite easy per company, the only thing you need to do is to click on a company which has been identified visiting your website. After you will see the source of the visit, the pages visited and how long they have been at those pages.
In the case below you can see Supermetrics visiting our site via one of our Linkedin posts, as we can see where they landed we know which post it was. If we would have posted this link on other places a UTM tag would come in handy to track it better.
If you want to see which companies come from a certain source you can use the “Custom Feed” feature. We will explain below how you can filter the traffic coming on your website.
Reading advice: How gain insights about your website traffic
How to see companies visiting from Google Ads
When you want to filter the companies identified on your site you can use the ‘custom feed’ feature. This is a great way to see companies with certain behaviour, coming from a certain acquisition channel, having certain company criteria or any integration information.
You can create a custom feed easily as it is shown in the navigation bar on the left side.
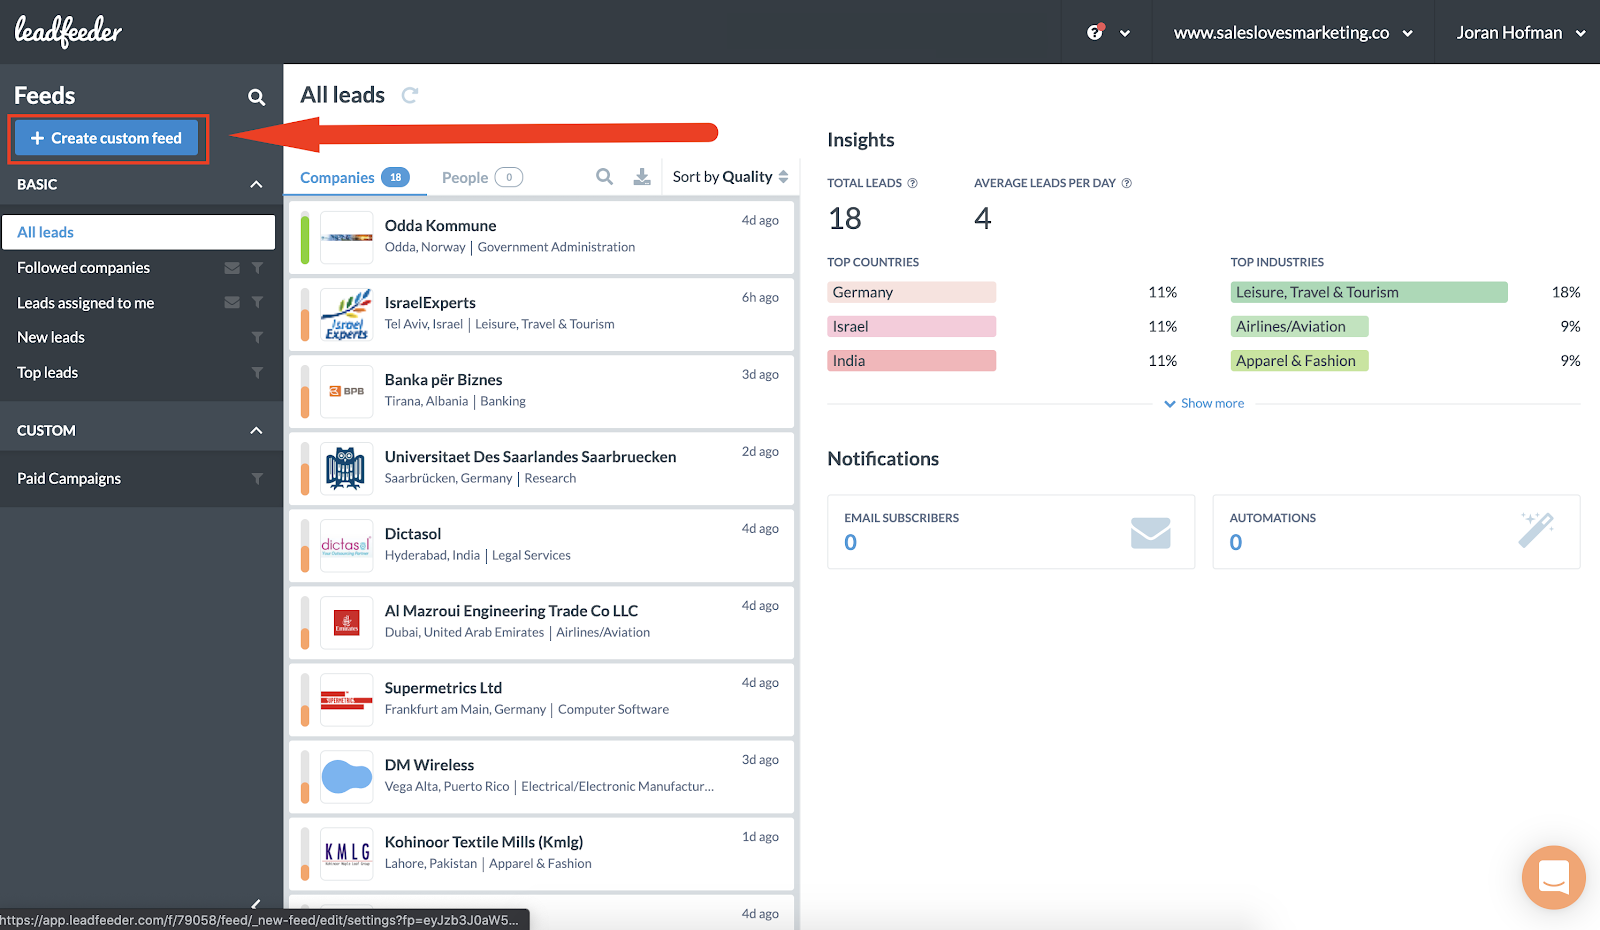
When clicking on it you can directly name the ‘feed’ and start adding filters to them. The terminology is the same as within Google Analytics so it should be easy to navigate through them. If you are not familiar with all the terms, check out our Marketing Terms glossary.
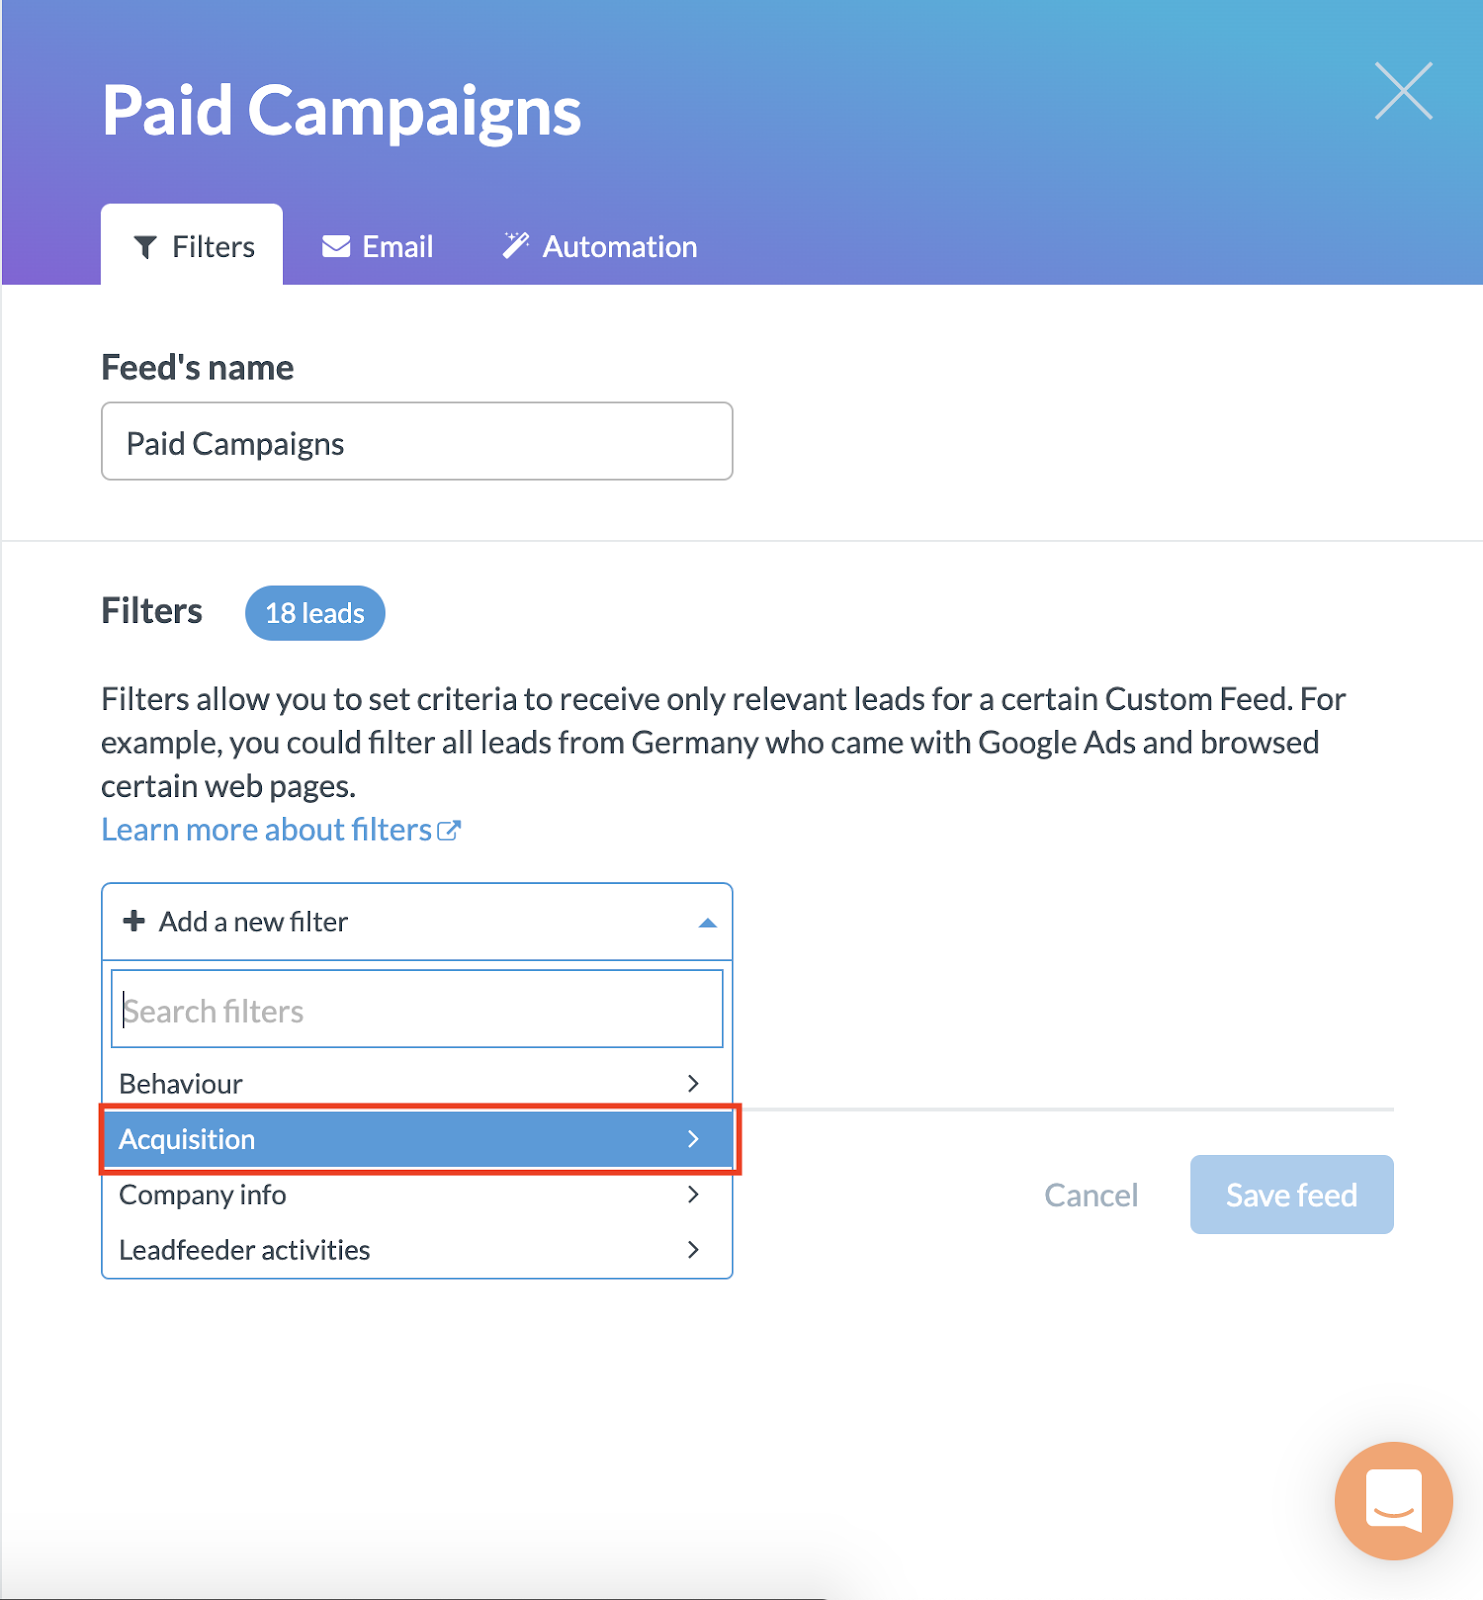
To identify where the traffic is coming from we would start adding Acquisition filters. When you want to see all your paid marketing combined filters are dependent on two things;
- How many paid channels are you using
- Are you having UTM tags behind your campaigns

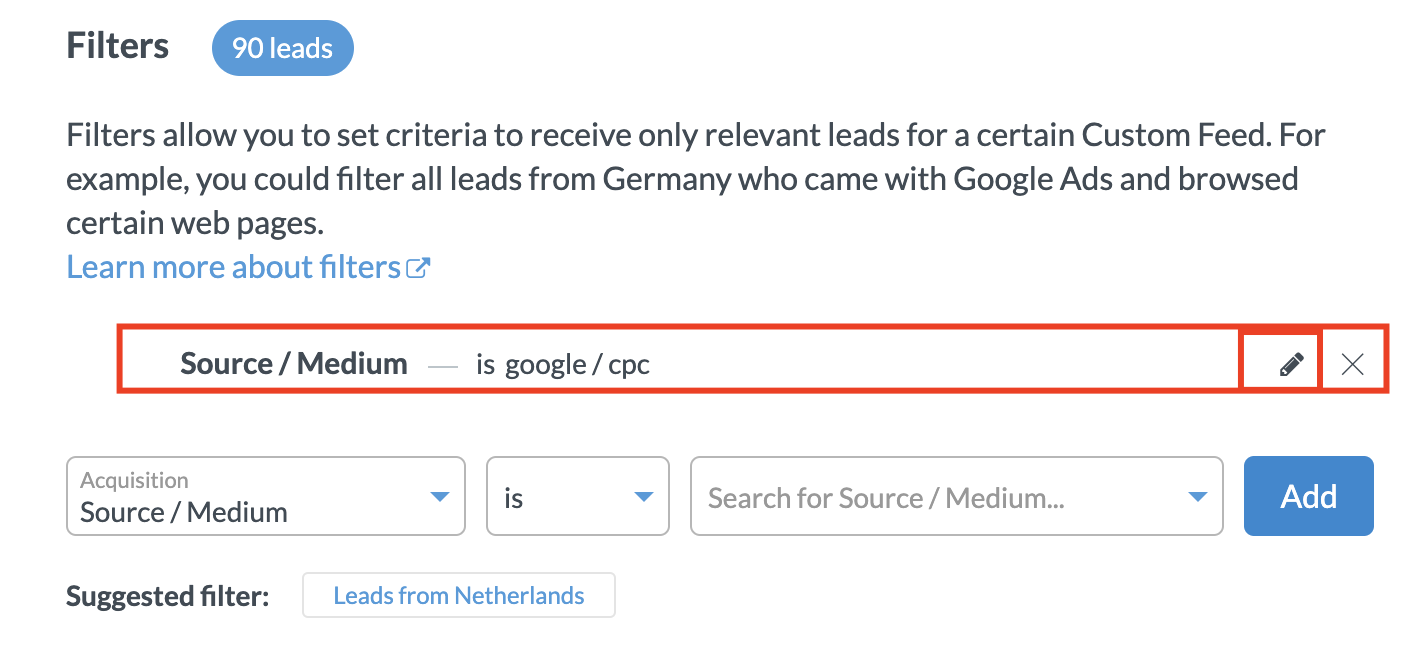
For now, we will set up a custom feed to identify ALL the companies coming from Google Ads. This is easy as we only have to look at the source of where the companies are coming from, Leadfeeder already gives you the CPC option. When you set up the below filter you automatically see all the companies visiting your website, from Google Ads, within the selected time frame.
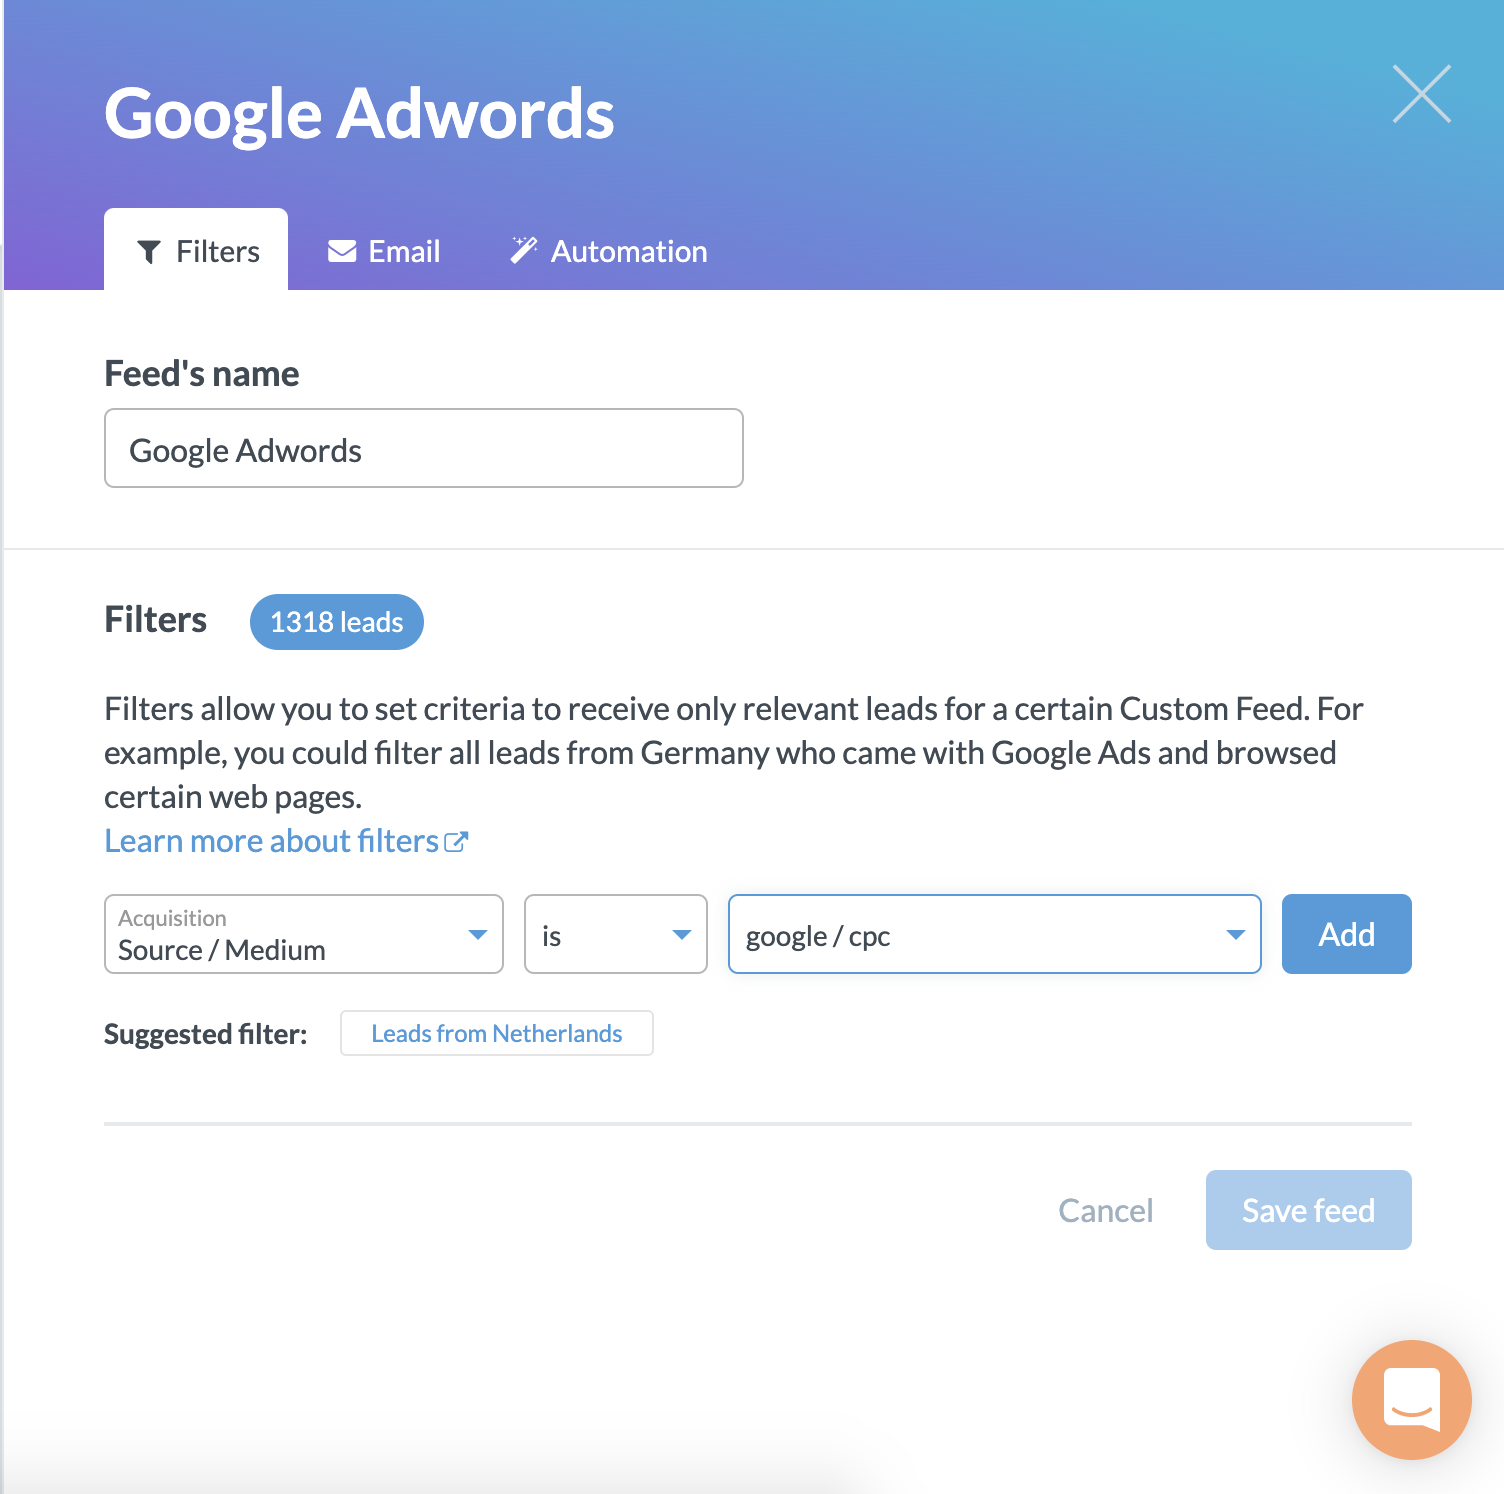
Make sure you press the ‘Add’ button so the custom feed will look like this;
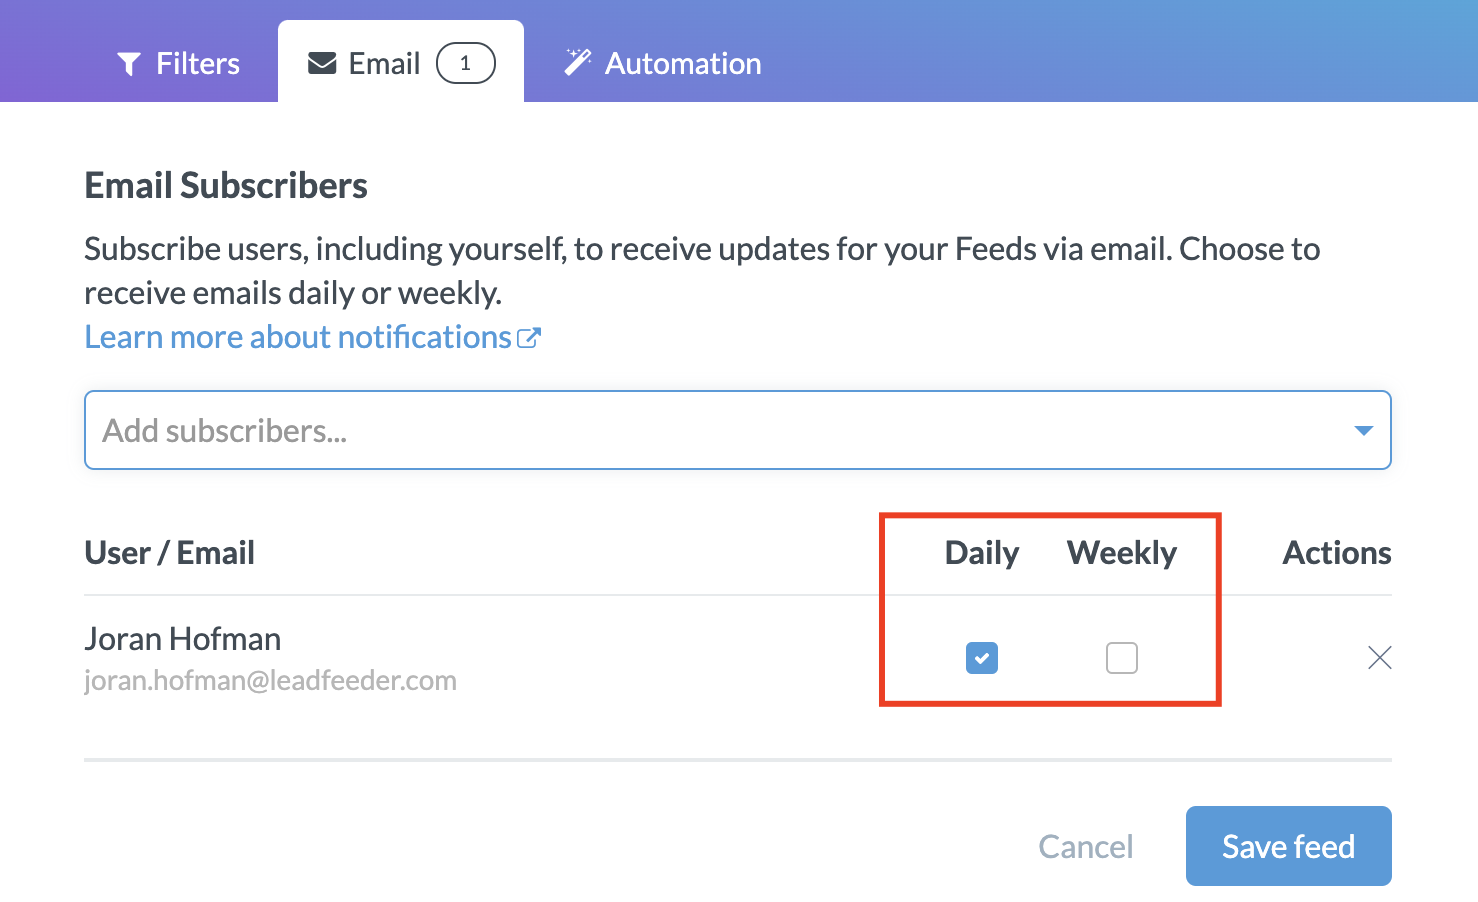
When you are happy with the custom feed you can save it or continue to set up some automated actions;
- Receiving daily / weekly emails
- Sending the information to any of the integrations you made (CRM or Slack)
For receiving an email you can choose between daily or weekly updates, this way you don’t get spammed by notifications about any of the feeds you are creating.
Automations come in ‘Leadfeeder actions’ or integration actions. In the example below Salesforce is connected as a CRM system and we could send leads directly to Salesforce. For now, we choose to keep everything within Leadfeeder and adding tags to certain companies.
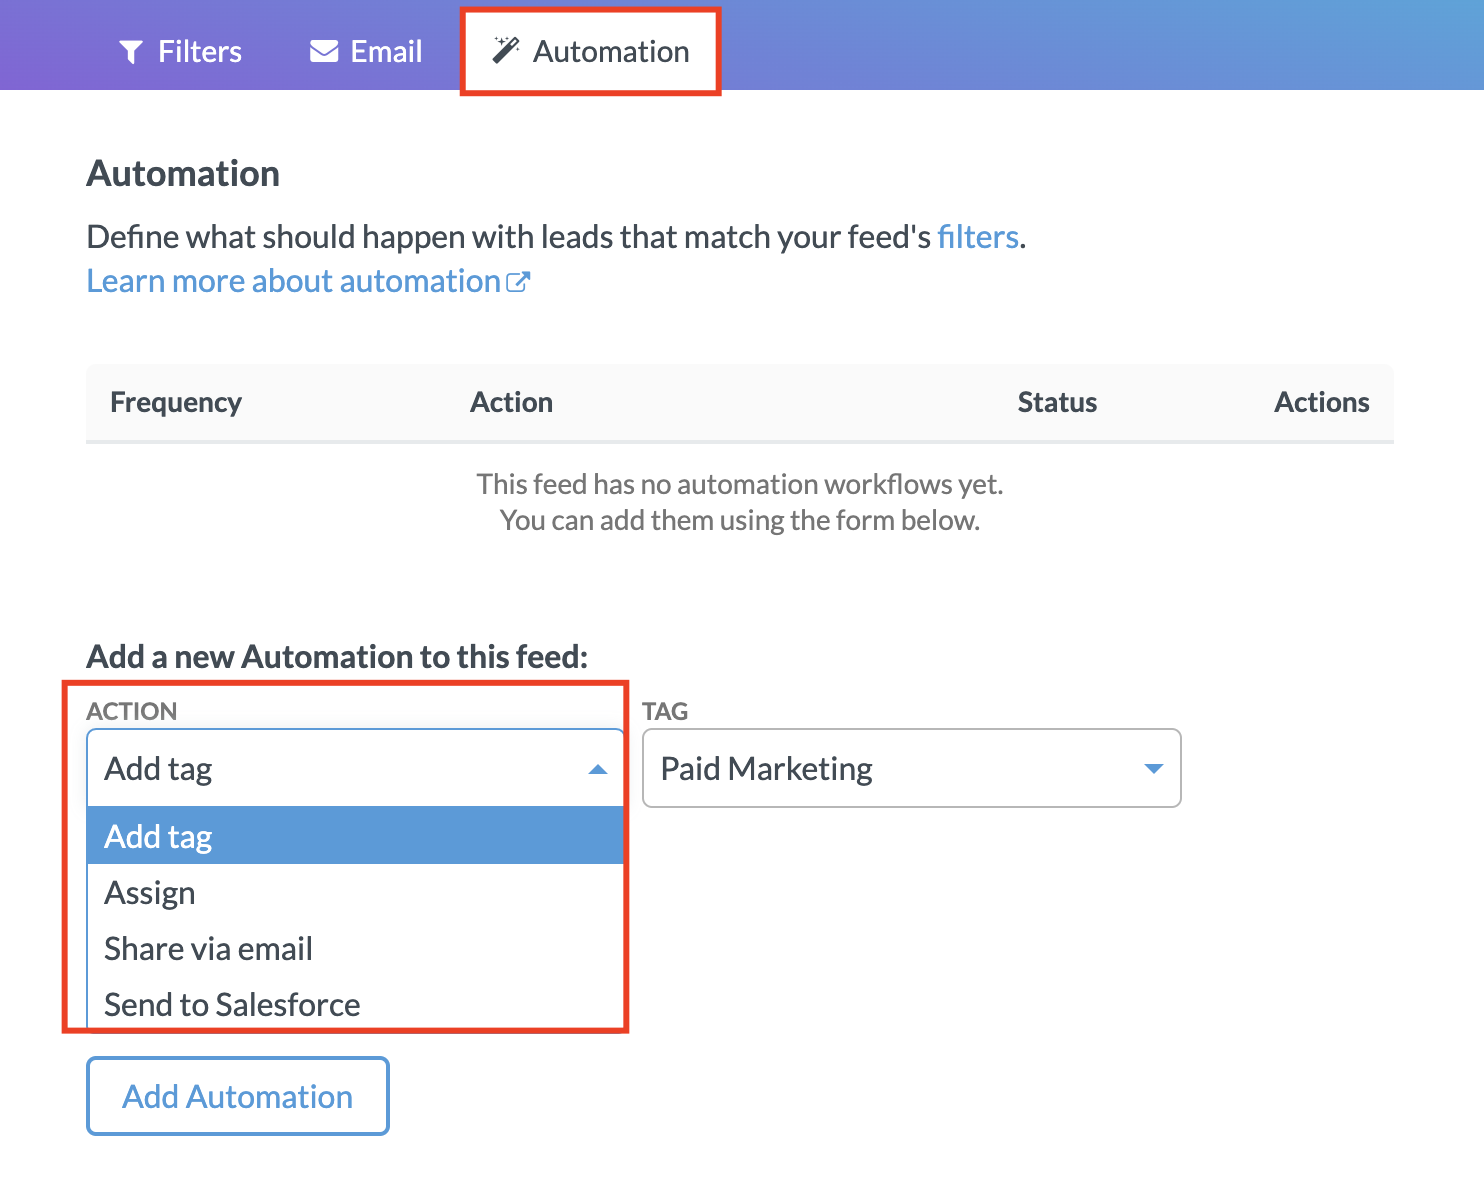
A great way to see certain information within the timeline easily is using the tagging feature, this way you can see exactly what the company has been doing based on your criteria. See below how you can tag them with ‘paid marketing’ when they appear on your website, via Google Ads in this case.

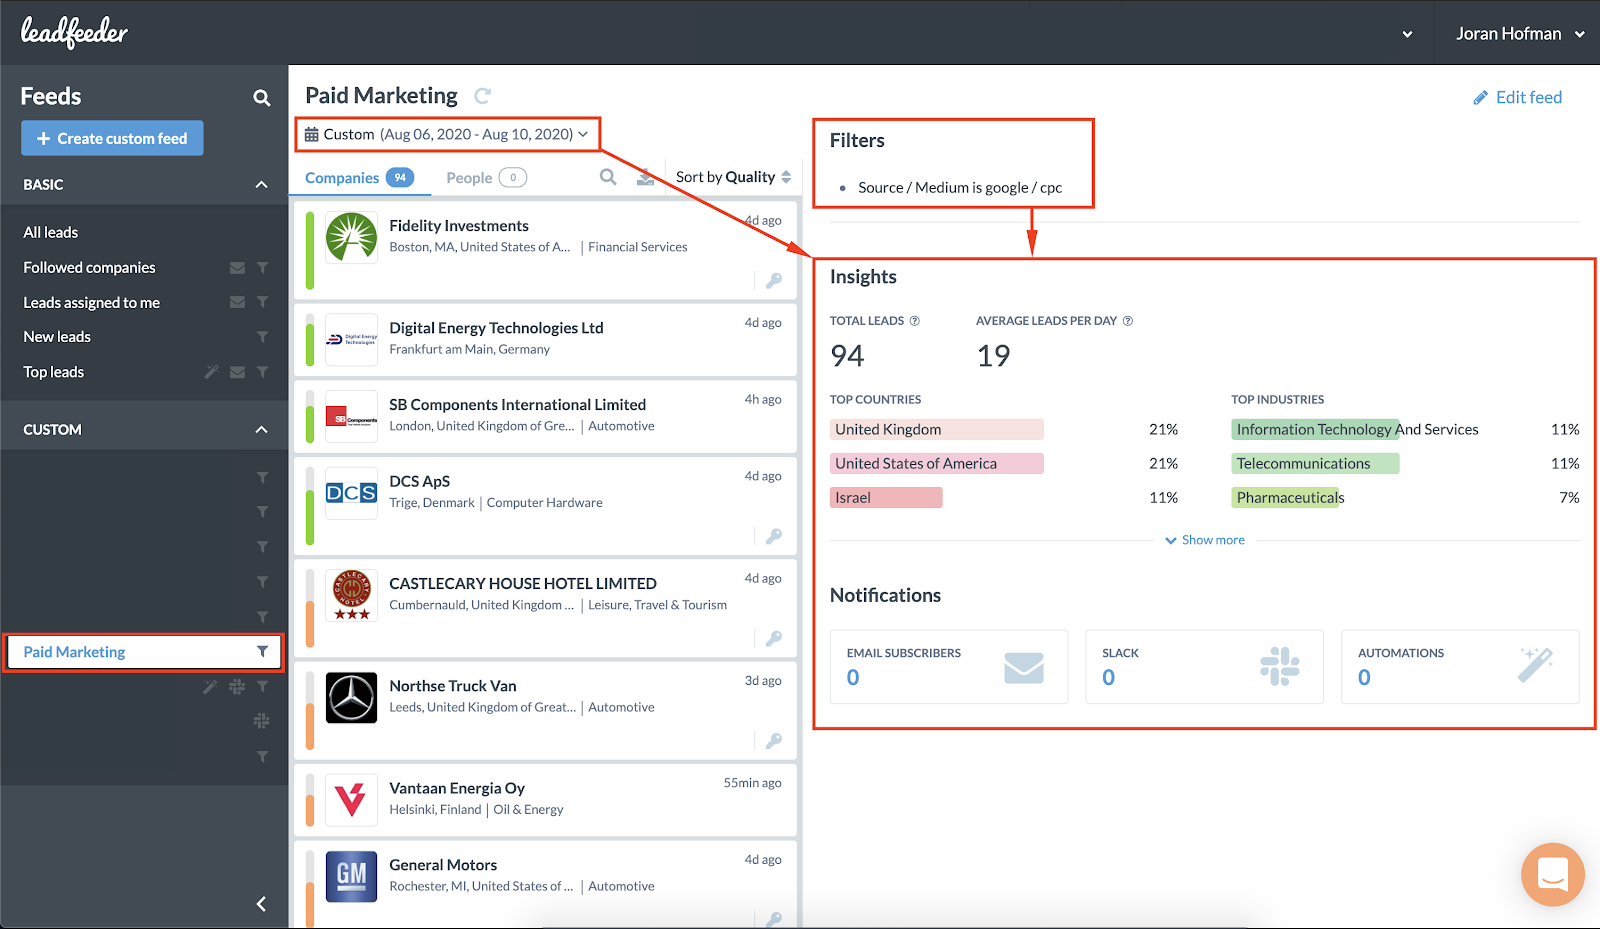
Once you hit save you have created your own custom feeds, filtering identified companies which came via Google Ads to your website. This will give you new insights into your marketing efforts for sure.
After saving you will see your custom feed in the navigation bar on the left. It is a dynamic filter, this means that it changes along with the date range you are looking at. After creating the filter you can look back as far as you have data.
The insights section will show you some quick stats on the number of leads identified, where are they coming from and what automation you have running on the custom feed. See companies visiting your website coming from your UTM campaigns
When you are running any other campaigns other than Google you might want to use the UTM option. A UTM is a way to track links you post online, this way you always know where the traffic is coming from.
Example; if you are going to run a campaign for a certain product/service you might want to tag the links as you are going to share it via multiple channels. Let’s say we would run a campaign for the Leadfeeder listing which is located here: https://www.saleslovesmarketing.co/tools/leadfeeder
If we would use the link like above it could be considered as direct traffic as people are clicking on the link and end up directly on this page. This doesn’t give you the insights you probably want, hence you want to start adding UTM tags to your links.
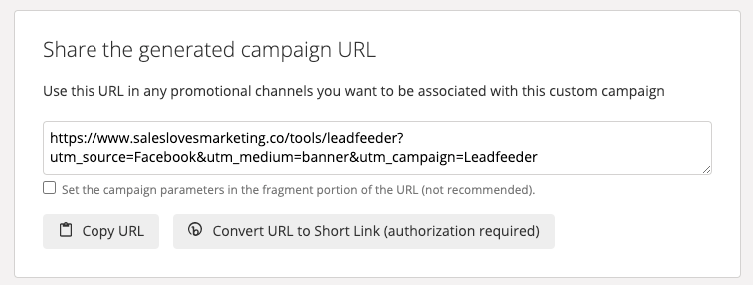
An easy and free way to do it is to use the Google campaign URL builder for it;

It asks you certain information about the campaign and from there it will generate you a new link you can use in the campaign. This way you will see the data within GA and Leadfeeder.
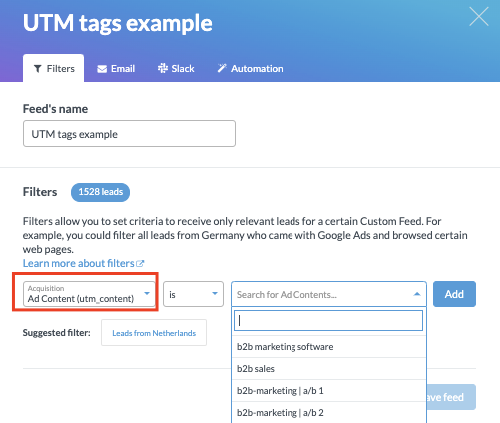
When you will open the filters you can see the UTM tracked easily using the filter ‘utm_content’. From here you can see all the links you have tagged along with the name you gave it. Here you can only track the content one-by-one which will not be ideal for you when you have a lot of links tagged.
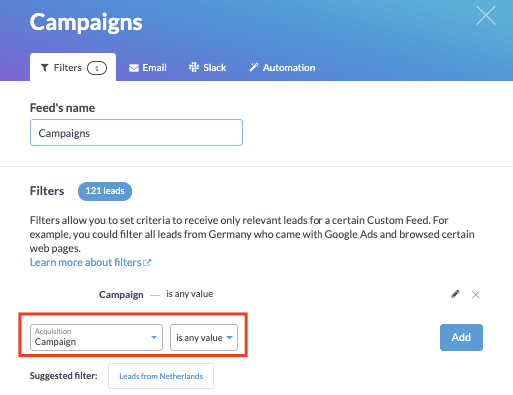
If you are running a lot of campaigns we would recommend using the campaign filter, this way you can select “all campaigns” instead of including them one-by-one.
These are the two easiest ways to quickly see the traffic coming from UTM tagged links or your overall campaigns. With the other acquisition filters, you can dig into the traffic deeper when you would like this. Remember you can also add filters on top of each other, which means you could narrow down your filters where needed.